
There are a lot of puzzles in Resident Evil: Requiem but none of them are as complex as the ‘Final Puzzle’.
As of today, March 2nd, said Puzzle is finally solved! It took a whole weekend (and a datamining tool), but the community finally has solved the Puzzle!
The entire solution and previous steps/hints will be discussed below!
Final solution and steps are at the bottom. Spoilers ahead!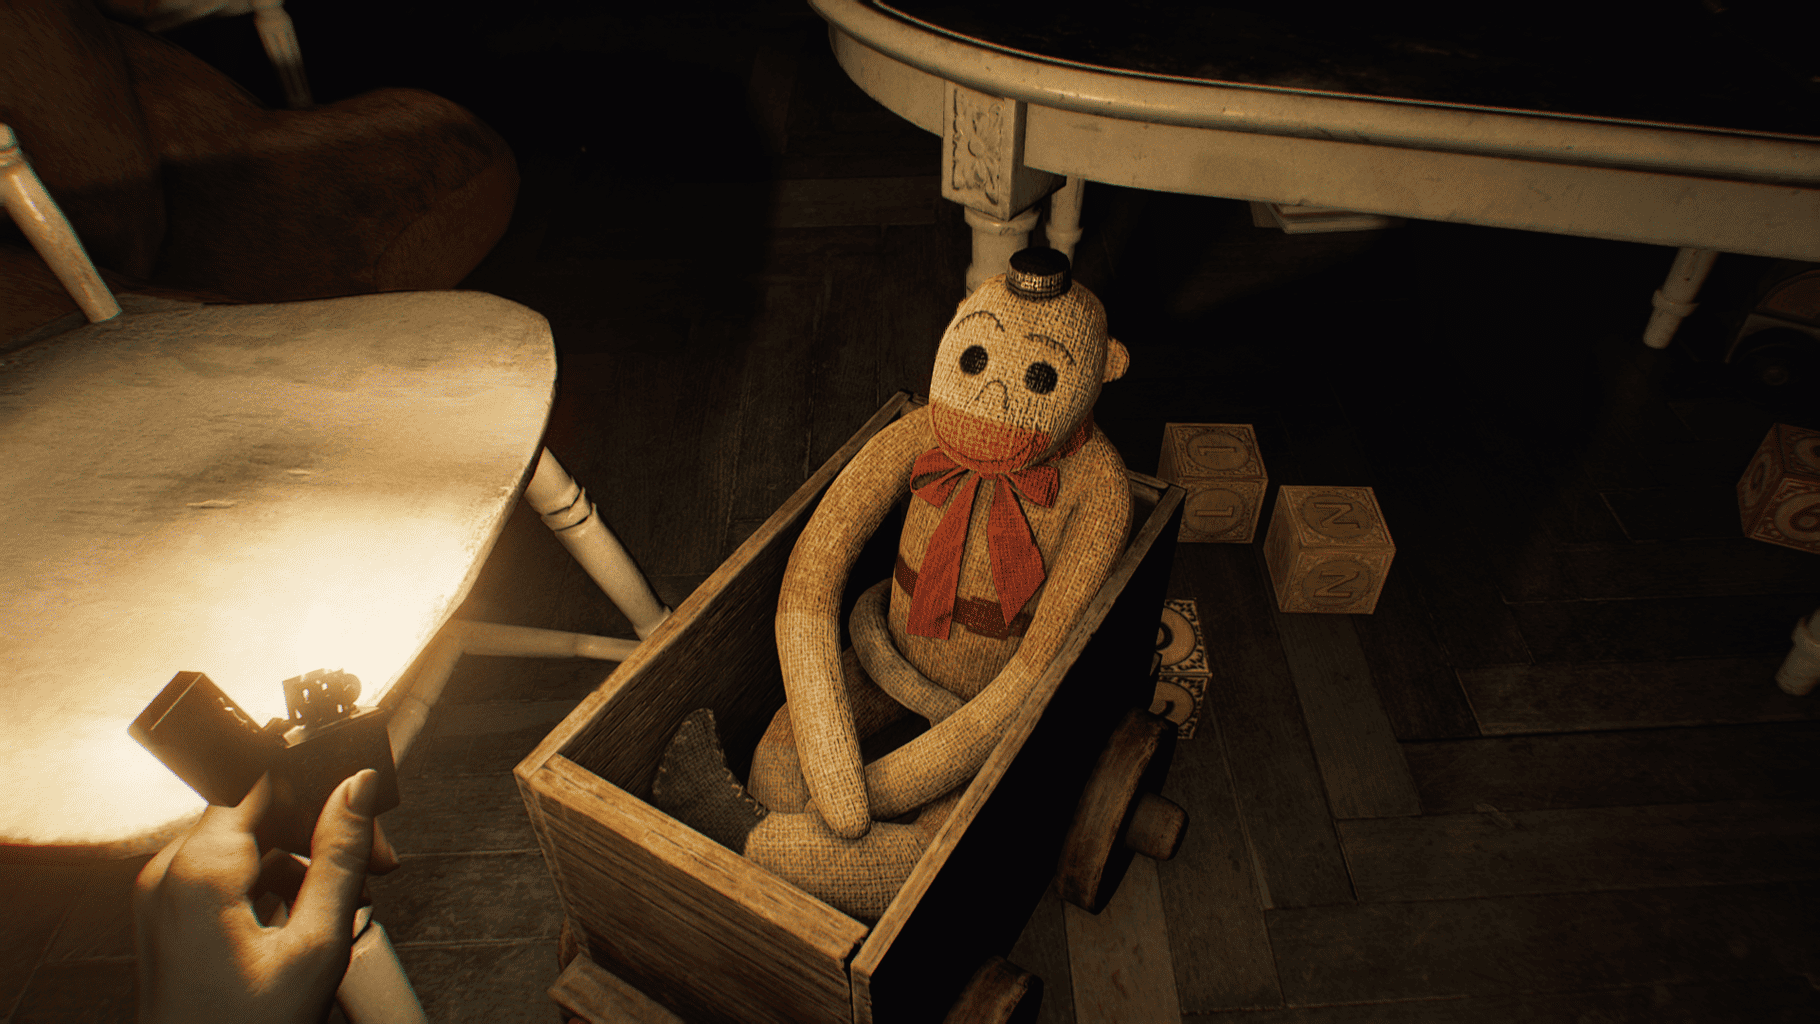

severed hand & how to use it
The community as of writing thinks that the start of The Final Puzzle starts near the end of the first Act.
As Grace, you will be be trying to escape the monster called ‘The Girl’.
In the section where you rescue Emily from ‘The Girl’ who left her in the cell ends with both Grace and Emily taking the elevator back up into the main building, resulting in ‘The Girl’ chasing and losing one of its hands as its caught between the elevator and floor.
That severed hand can be picked up, marking it as the first interactable that the community found suspicious, as it served no purpose.
Or so we thought, as it is discovered that the Severed Hand can be brought back to the Blood Lab, where the player does Blood Specimen Puzzles, it can also be Analyzed by the same machine.
Once analyzed and solved a cryptic hidden message is given back:
”Let’s play.
GGC AAG AUA ACG UGU CA”
what’s next?
The message appears to mimic an RNA sequence, but within it lies a code to be solved. We know this because of one major change that happens only after you scan the Severed Hand.
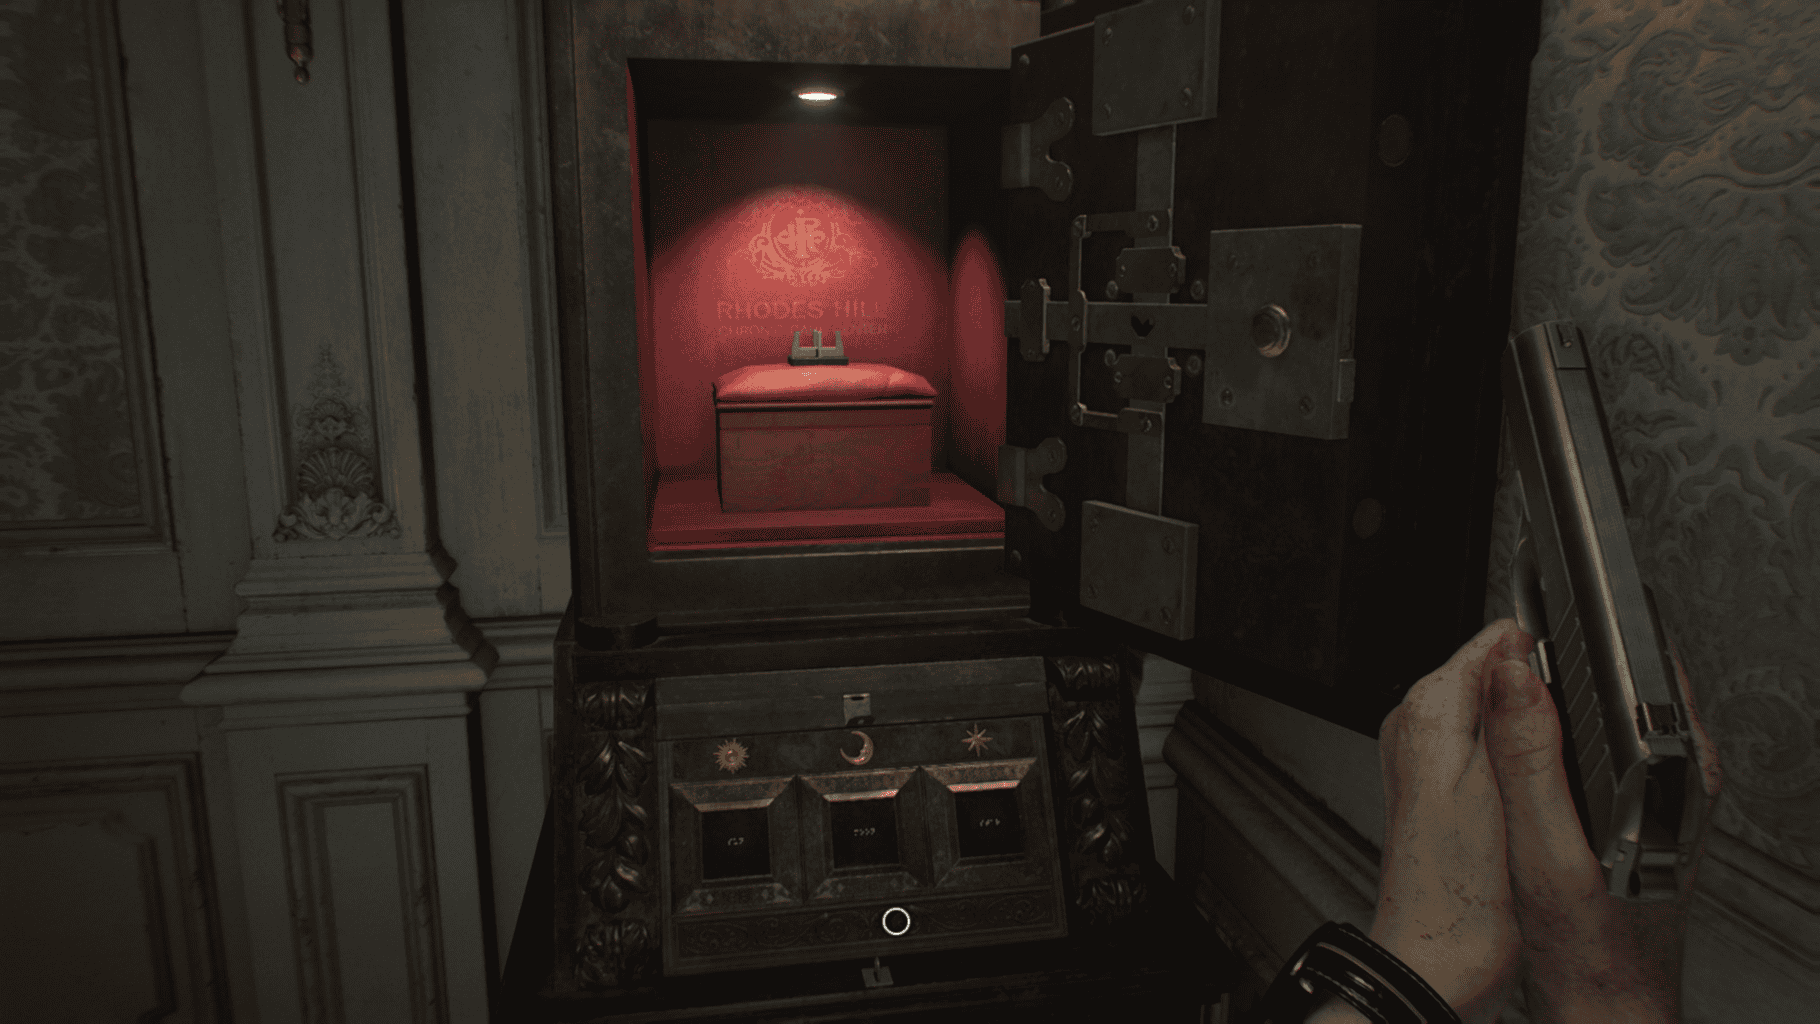
In the Lead Researcher’s Office on the second floor of the East Wing, you can approach the safe that held the Sun Quartz, and find that you can still input a code by tapping on the Sun, Moon, and Star symbols. It stands to reason that each of the symbols may refer to one of the letters in the RNA sequence, but finding out what each one represents is another puzzle.
To begin solving this, we need to look at other strange items that at first glance serve no purpose.
Not long after you escape the Care Center, Grace will head into a strange VIP Suite past the courtyard, and uncover a room that holds a secret in its center when the correct item is placed in it.
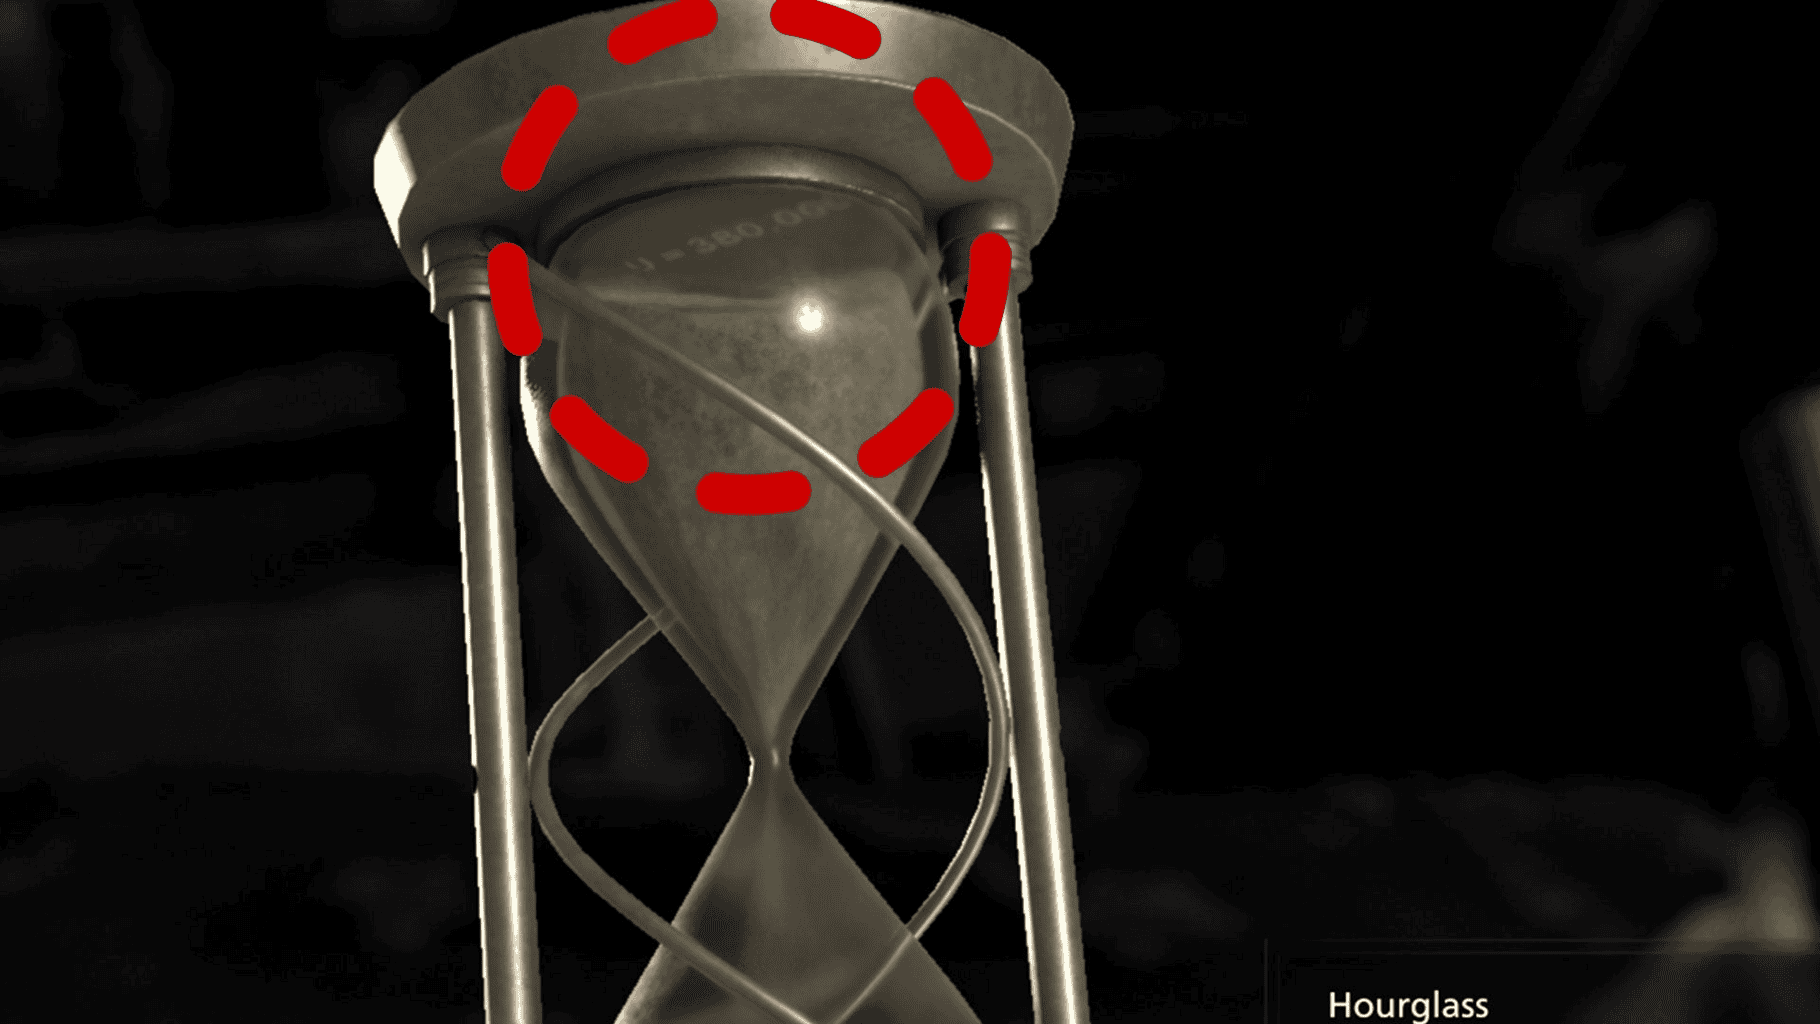
While searching, you can find an Hourglass on the main desk that can be removed from its base and placed in your inventory. However, trying to use it to solve the puzzle in this room reveals that it’s simply too big.
Even when the puzzle in the room is solved, the Hourglass remains in your inventory to serve no purpose.
Until you inspect the Hourglass, even while it is still attached to its base, you’ll find that tilting the object in 3D actually causes the sands to fall if held upside down. When you do this, you can spot a small message along the bottom of the inside of the base, revealed only when the sands fall away: ”U = 380,000”
Since we know these letters somehow refer to the moon, star, and sun, you can begin checking the number against known scientific facts. As it happens, the Moon is roughly 380,000 kilometers from the Earth, so in the sequence we need to solve Moon = U.
Two other letters have similar codes hidden elsewhere in Resident Evil Requiem, but you’ll need to know where to look to find them.
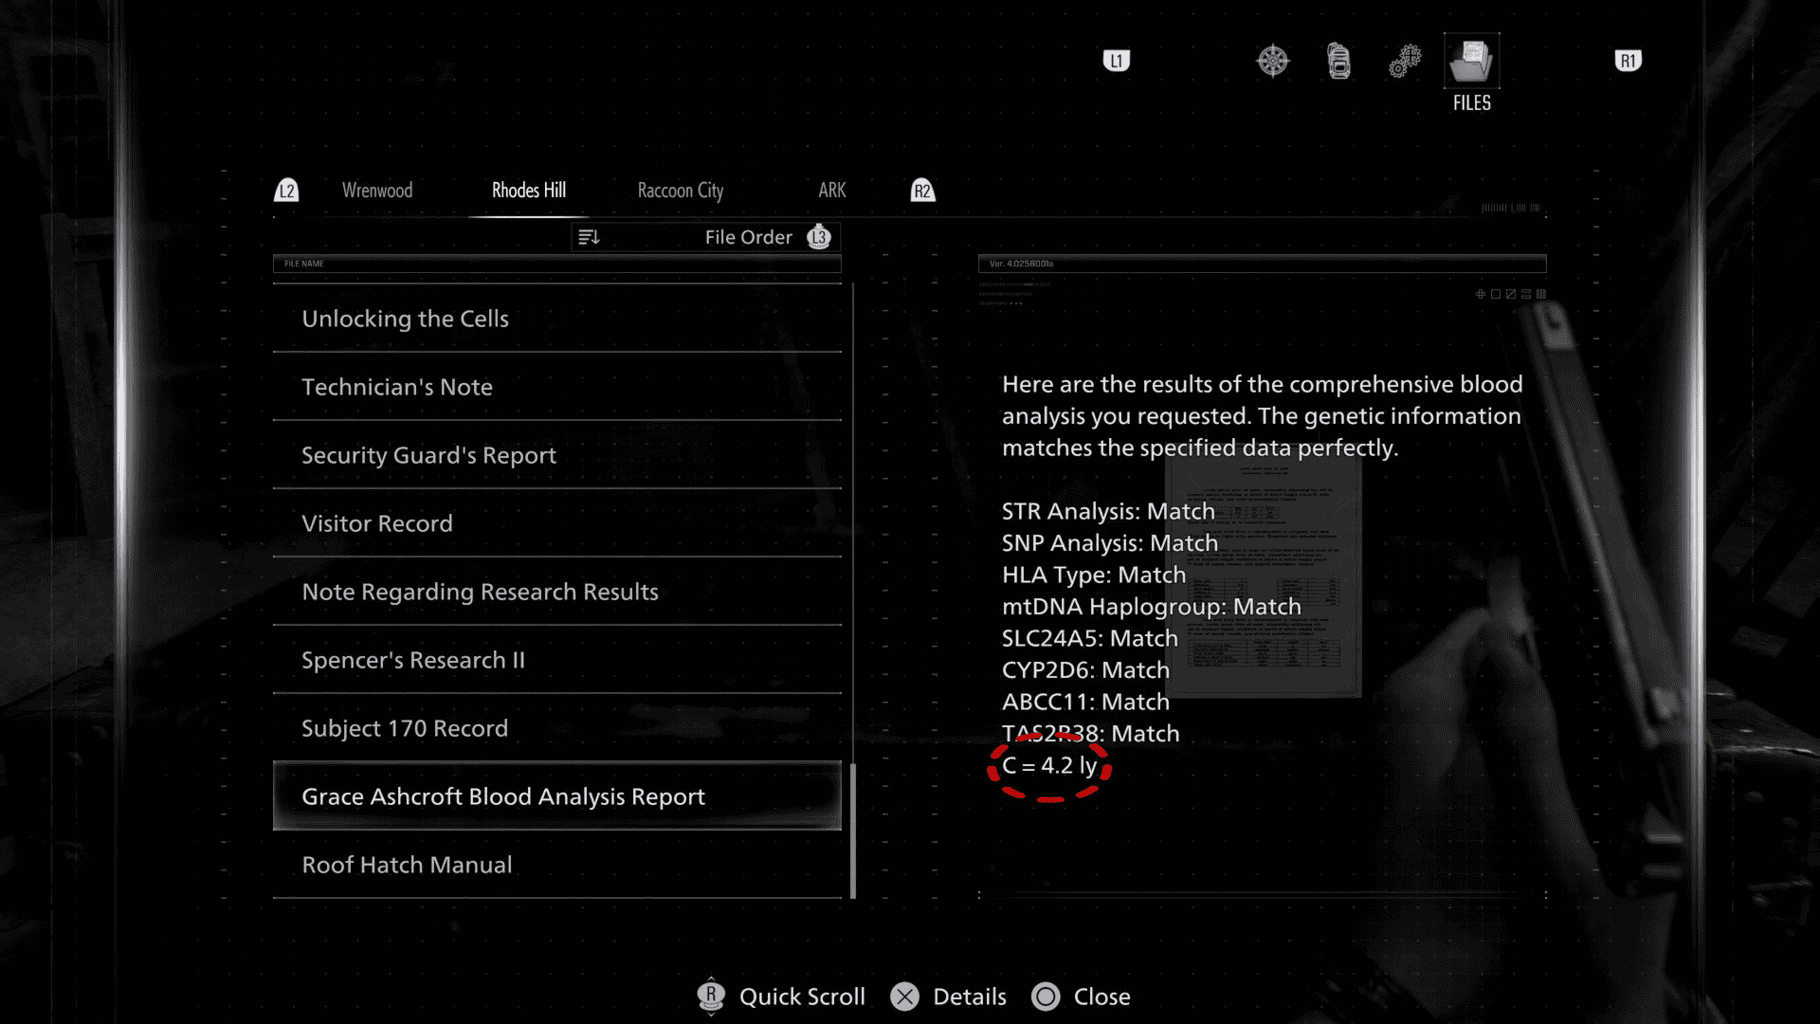
Further into the Research Facility below the Care Center’s Courtyard, you can come upon Grace Ashcroft’s Blood Analysis Report, a File found just before the lab with the helicopter key. In it, the very last entry reads: ”C = 4.2 ly”
Since we already know the first clue was the distance to the moon, we can now look at other scientific facts covering distances to celestial bodies. The distance to the nearest Star (that is not the Sun) happens to be 4.2 light years away.
So that results in Star = C.
For the third letter, it’s actually been hiding in front of you since you started the puzzle. You need only look at the side of the Laser Microscope in the Blood Lab in the Care Center’s East Wing to find a sticker tucked away that reads: ”G = 150,000,000”.
A bit of research will confirm its relation to the last celestial body on our list: The Sun is around 150 million miles from Earth. That results in Sun = G.
The Toy Uncle Bobblehead Solution
When you progress through the story you eventually end back up in Racoon City as Leon, and this specific part takes place after you moved through the R.P.D. into the ruins of Kendo’s Gun Shop
After you entered the Gun Shop’s backroom you are supposed to make your way on over to the Orphanage, but along the way you can spot the torso of a Toy Uncle Bobblehead in the corner of the room that cannot be interacted with whatsoever.
For now, ignore it and keep moving forward.
Eventually you come across a boss that is guarding the route to the Orphanage.
After defeating the boss you will come across the ruins of a basketball court that features the head of the Toy Uncle Bobblehead right in the middle of the court.
It cannot be picked up, however you can walk against it, forcing it to move.
Force its way over to the basketball hoop that is turned on its side and get it through it, which then triggers a sound effect of a metallic door being unlocked.
After doing so, the basketball hoop is now interactable to give you the text prompt message saying ”There’s no time to play around”, referring to another message we received previously that asked us to play.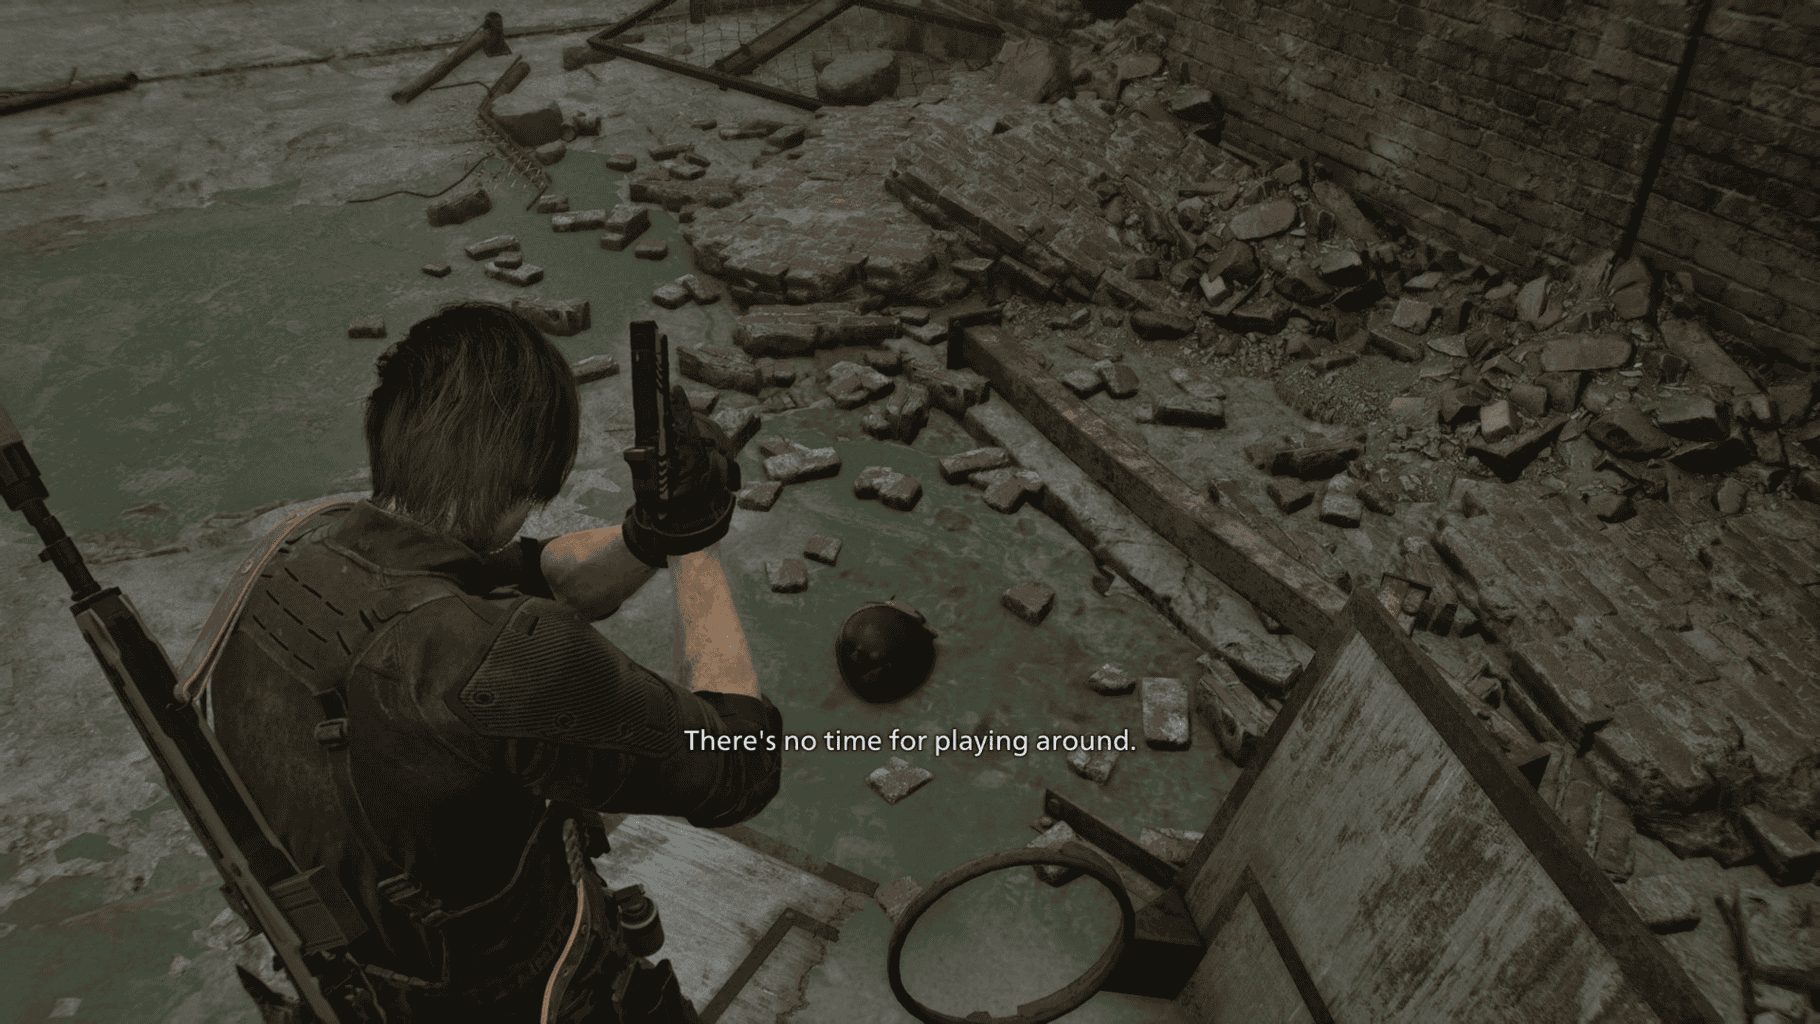
After doing this it’s time to backtrack all the way back over to Kendo’s Gun Shop, specifically the torso of the Toy Uncle Bobblehead we found earlier.
Now it is interactable, and just like the basketball hoop it now prompts a message stating ”Just ignore A”.
Confusing at first, but it is referring to the initial cryptic message we received from the Severed Hand, telling us to ignore all the A’s in its RNA sequence.
Doing so results in a entirely new sequence: GGC GUC GUG UCU.
solving the first part
We now have all the answers we need to solve the first part of the Puzzle.
Once you have used the Severed Hand at a blood analysis machine during a playthrough, return to the Lead Researcher’s Office on the second floor of the Care Center’s East Wing.
Interact with the safe that held the Star Quartz.
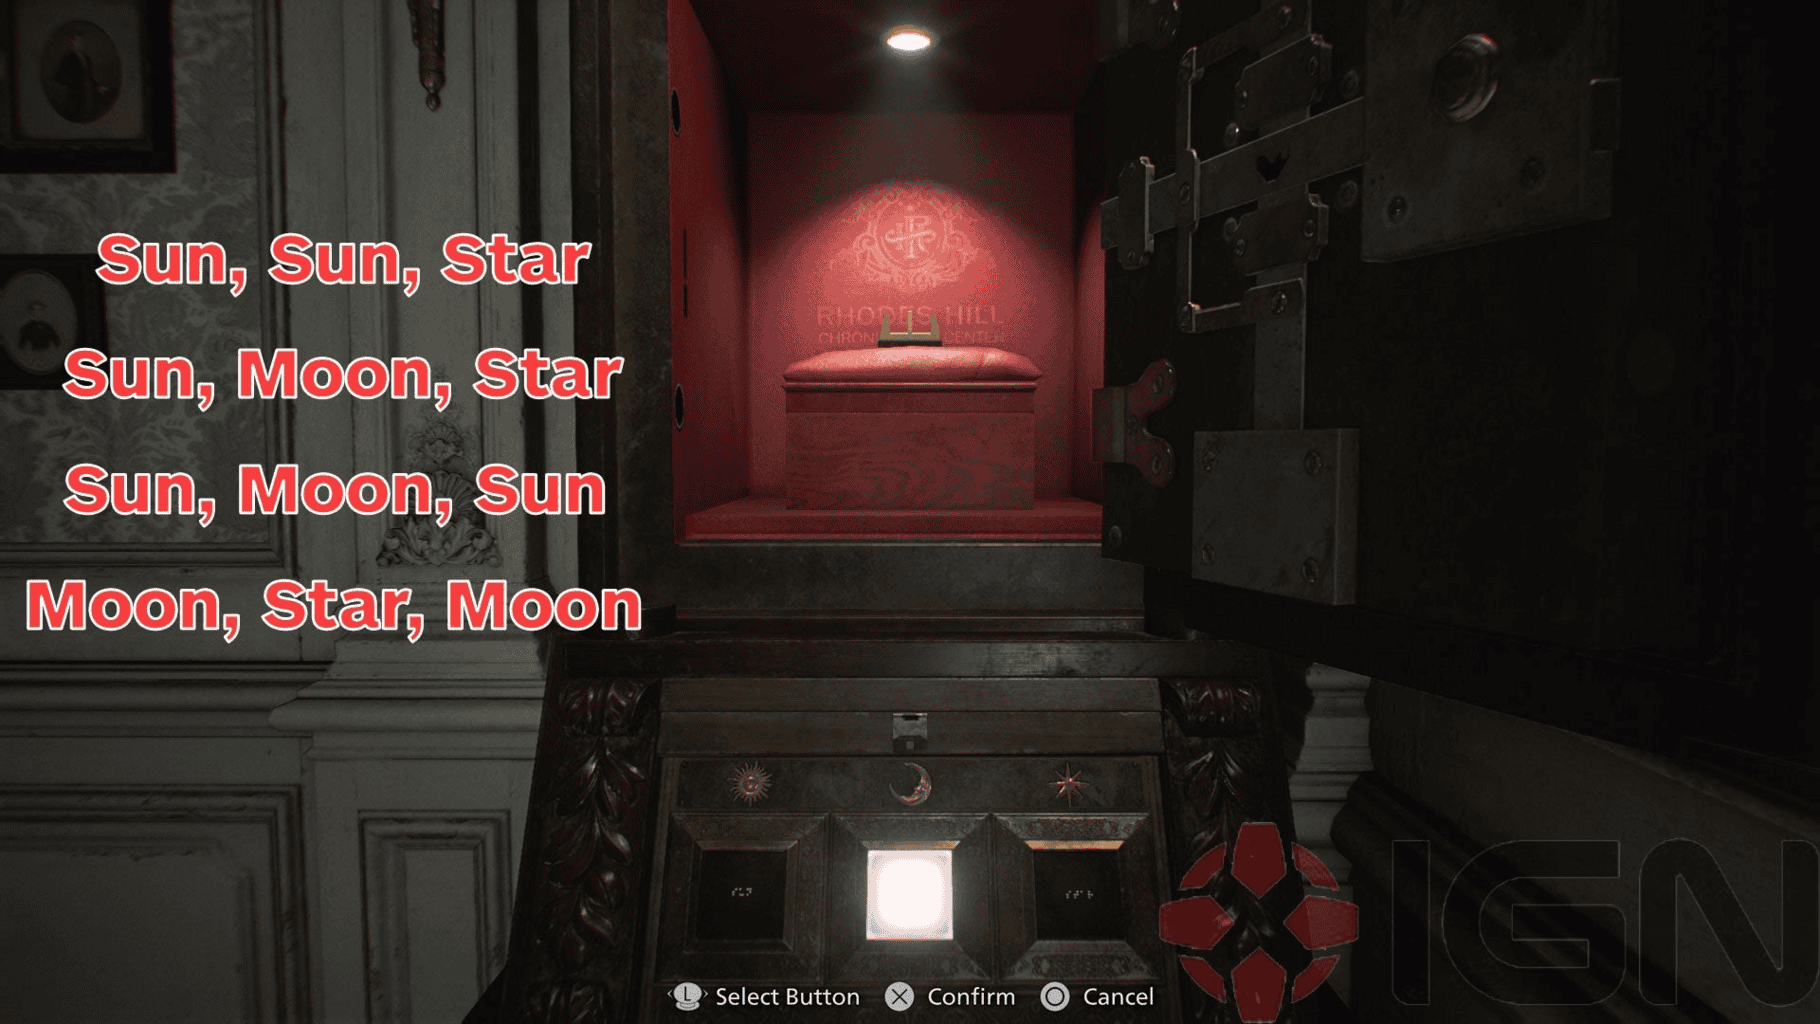
You will need to enter the sequence the Community deciphered and convert it into celestial symbols: Sun, Sun, Star – Sun, Moon, Star – Sun, Moon, Sun – Moon, Star Moon.
You know you have done this step correctly when you heard the laughter of a child.
As of writing, this is where the Community is stuck on. What does the message mean? What is next?
We will update this article when more discoveries are made!

the final puzzle has been solved!
As of today, March 2nd, the Final Puzzle Challenge has finally been solved!
Although a datamining tool has been used (that same one being used to solve COD Zombies Easter Eggs) to help solve the puzzle, it still counts and concluded a weekend long hunt to its solution.
Follow these steps to solve The Final Puzzle challenge:
- Play the game until the point of Grace reaching the Basement section, the one where Emily is being held captive. Here you navigate to the Meat Processing Plant and wait there for an entire 15 minutes. Make sure you do not kill any Zombies in the area, including the grinder section, as that would force you to wait another 15 minutes or even entirely reset that playthrough.
- Continue the story whilst not killing any Zombies in the Basement section and escape up the elevator. Do not pick up the Severed Hand, simply go to the West Wing bathroom stalls. Inside there go into the first toilet stall and flush the toilet exactly 8 times
- Now you continue playing the game up to the point where Grace is sent to collect the Pilot his helicopter key, inside of Victor’s basement. At the start of the escape section Marie’s doll, the same one you could find earlier (but doesn’t do anything) in her cell, will spawn in at the bottom of the staircase on the left. Make sure you pick it up!
- Complete your entire playthrough with Marie’s Doll being stashed in Grace’s item box/stash box, as it will be needed in your next playthrough. That is the playthrough where you can solve the Final Puzzle challenge.
- In your new playthrough simply keep playing until you reach the Basement section again, get Marie’s Doll into your inventory from the Item Box, escape the Basement and this time you do pick up the Severed Hand at the elevator. Bring it to a Blood Lab to scan the Severed Hand, then head over to the East Wing while you are carrying Emily. Now head over to the Security Manager’s Office to enter the Puzzle Box code (Star Star Moon Sun) again whilst still carrying Emily. If done correctly you will now hear a child’s laughter, and a text prompt show up on screen not long after to confirm you completed the Final Puzzle (as seen on the image above!) and to check your Challenges.
Congratulations, you now solved The Final Puzzle!