Call of Duty: Black Ops 6 Zombies welcomes its 3rd DLC map release to the mode. ‘Shattered Veil’ brings plenty of secrets & Side Easter Eggs for players to indulge in. This is no different to all previous BO6 Zombies Maps. Today, we’re going to go over every single DLC 3 ‘Shattered Veil’ Side Easter Egg found, as well as how to complete them. Here’s what you need to know about DLC 3’s Side Easter Eggs:
ALL SIDE EASTER EGGS
Easter Egg Song
As per usual, there are 3 Mister Peeks headphones, scattered around the map. These are the 3 locations you can find the Headphones at:
- Behind the Elevator on the right side.
- Under the staircase in the room with a statue, inside the Conservatory.
- Down in the Service Tunnel, you can find a charred body & the headphones will be underneath it.
After activating all three headphones, the music Easter Egg will begin playing!
Free Perk
After collecting the bell and obtaining the ritual item for the Raygun Mark 2 Wraith Fire quest, interact with the bell 115 times for a free perk power up.
Free Wonder Weapons
Wunderwaffe DG-2

First, you’ll want to ensure you’ve completed the ritual in the distillery. After completing this, head to the Nursery’ & shoot at the glowing clothes under the child’s bed.
Make your way over to the East Balcony (where Elemental Pop is located) & shoot a glowing book sitting on a chair. This will trigger a mini-boss fight. This book mini-boss will be protected by small talismans. Destroy them & fire upon the book itself. Repeat this cycle till it’s reduced to mist.
If you then head towards spawn, specifically the Garden Pond area & look towards the back corner of the area, you’ll spot a glowing ball. It will be higher up off the ground, kind of in the foliage. Shoot it & another mini-boss (the same as the first one) will trigger.
The final glowing item you need for this quest is the family portrait of Richtofen. This picture is Richtofen, his wife Mary, & his son Samuel.
It will be to the left of the Juggernog Machine, on a small table. Shoot it, & the same mini-boss fight will trigger for the last time.
After shooting all three glowing items & defeating the glowing book mini-boss, make your way to the elevator & rappel down. Once at the bottom, look back up & shoot the glowing energy that has appeared. Shooting this will trigger the FREE Wunderwaffe to drop.
Ray Gun Mk 2

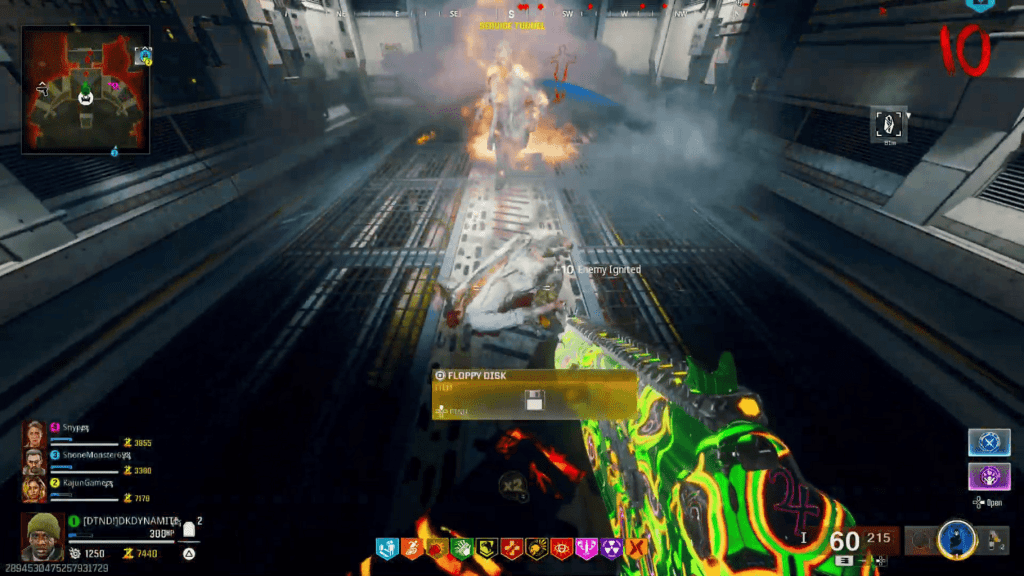
You can unlock the Base version of the Ray Gun Mark 2 through an unlock quest. To do this, you’ll need to acquire a floppy disc from a purple eye zombie, during a toxic zombie round. Round 10 to be specific. After killing it, it’ll drop the floppy disc for you to grab.
Take that floppy disc to a fax machine located upstairs to receive a word. Head to the Nursery to solve the next step. For example, our word was WORM.

Once in the nursery, look at the board with the letters. Each letter is within a group. The number of letters within each group will equate to the corresponding number you need. With our word being WORM, The code was 9377.

After solving the code, head back down to the S.A.M Room, and make your way into the deeper tunnel. There, you’ll find an HVT Dopplegeist. Once you release & kill it, it’ll drop a severed arm.

After grabbing the severed arm, head to the armory, which is a little further in the tunnels. While in there, you’ll be able to unlock the case containing the Ray Gun Mark 2.

Jumpscare Rewards
Players will need to equip the Etero Thermal 2x scope or a legible thermal optic onto their loadout or zombie build in order to activate a Jumpscare.
Beginning on round 13, a ghost can be seen in the outside windows around the mansion and will move to a new window around 45 seconds after you spot it.
Focus first on being in the very front of the mansion, then the east and west balcony’s where you’ll spot the ghost next.
You aren’t timed, but once you’ve spotted the ghost up to three times, the fourth spawn will always be in the southwest balcony window just outside of the nursery.
After the fourth ghost has been spotted, players can interact with the makeup table just a few feet away in the nursery which will trigger a Jumpscare for the entire team.
If a player interacts with the makeup table now, valuable rewards like a perk, scorestreak and an Aether tool can be acquired by each member of the squad!
Sleep Walking
On round 11 exclusively, interact with the grandfather clock in the study until the dials start spinning.
Lay prone on Richtofen’s bed in the director’s quarters and as you transition to round 12 your screen should fade to black.
Follow the footprints while crouch walking and don’t disturb the nearby sleeping zombies. Eventually, you’ll come across a sleeping zombies with colored Z’s floating above their head. Collect the key and open the free loot chest which may contain valuable items!
S.A.M Laser Trap
A secret S.A.M trap can be activated in the mainframe after interacting with a few computers.
First, interact with the computer next to pack a punch until it says system booting. On the same round, interact with UP to three other computers until you receive a red infected pop up on the PC.
The three computers you need to interact with next are located in the following locations:
- Study, just near elemental pop
- Overlook, near the bar in the trex room
- West hallways near death perception.
Everytime you interact with ONE of those three above AFTER hitting the computer next to pack a punch (during the same round) you’ll see a “booting” pop up. At that point, end the current round and at the beginning of the next you’ll either see “cleaning” before it boots to the main menu OR a red infected pop up.
If the computer goes to the main menu, go back to pack a punch and interact following by interacting with another one of the three computers mentioned above during that same round.
Eventually, one of the three computers will give you a red infected pop up on the PC’s screen, which you can interact with to collect a floppy disk.
Take this floppy disk back to the pack a punch computer to insert it. End the round and hold interact again until you see an S.A.M icon on the PC’s screen.
You’ll now be able to purchase the L4Z3R.EXE trap for 2000 essence every round!
Free Max Rarity & Tier III Pack a Punch
Similar to The Tomb, free upgrades for your weapon can be acquired during an early round, but there’s a catch. You can ONLY do this Easter egg for the Marine SP shotgun whether you spawn in with it or purchase it from a wall buy.
Once the Marine SP is BLUE rarity or higher, you’ll need to buy death perception before you can place the shotgun under some deer head in the banquet hall.
At this point, either shoot the deer head to see a field upgrade pop up or match the deer’s eye color to the designated field upgrade that you’ll need to get kills with for a soul box:
- Light blue – Tesla storm
- Purple – Dark Flare
- Orange – Energy Mine
- Red – Frenzied Guard
Using the designated field upgrade, get kills until all three deer head match the same color eyes as the first, in which special enemies will then spawn that need to be eliminated.
After this, your Marine SP will be upgraded to the next available rarity. You can repeat this quest once per round, but may get soft locked AFTER you reach Tier 1 Pack a Punch which is rewarded if you’re already orange rarity.
If you’re on solo, you can save quit then resume the match to be able and redo this quest to keep upgrading your Marine SP all the way to Tier 3 Pack a Punch!
Mr Peeks Bodyguard
Players can spawn a free brainrotted bodyguard named Dougnuts by collecting six parts of Mr Peeks. Here’s where you can find each part:
- Garden pond near the rampage inducer
- On a rock ledge near the speed cola door
- Laying on the ground by the quick revive machine
- In a wine rack in the bottlery
- Hidden in a bucket behind double tap
- Behind a painting in the library
You can then bring all six parts to the motor court, where Mr Peeks can be crafted in which he will then spawn the doughnuts bodyguard.
Dougnuts will spawn as a vermin but as he gets kills will evolve into a parasite and then a doppleghast.
Guaranteed Free Powerup Locations
Free Max Ammo
On a stone ledge near the spawn area.
Free Nuke
Near a blue tarp in the underground service tunnel.
Free Double Points
Out of bounds on a tree log close to the west balcony.
Free Insta-Kill
Towards the middle of the elevator tunnel, which can be seen from the bottle level.
Free Full Power
Hidden in a vent within the study.
Free Bonus Points
Inside the opening above the stairs the East Foyer.
Free Max Armor
Behind the shed in the motor court
Free Firesale
Only AFTER collecting the other free power ups is when you’ll find a firesale located at the bottom of the chandelier in the Grand Foyer!
THE END
That’s all the Side Easter Eggs we know of so far here on ‘Shattered Veil’. For a video covering every single Side Easter Egg, check out the video below:

Stay connected with any new updates on Black Ops 6 Zombies & Warzone Season3 as they release on our Twitter, and our YouTube Channel!