


Kowakujo is right around the corner here in Call of Duty: Black Ops 7 Zombies, & with it comes a brand-new Main Quest. After the crew drops into the Japanese castle, their goals are to free the last Shadowsmith, regain the souls of Takeo & Carver, & claim the world seed. This Main Quest will come with unique completion rewards here in Black Ops 7 Zombies Season 4 Reloaded. Today, we’re going to go over how to complete the Kowakujo Main Quest, including every step, & every reward you can earn here in BO7 Zombies Season 4 Reloaded! Here’s what you need to know:
Main Quest Steps
Step 1: Access the Pack-A-Punch Machine
To begin the Pack-A-Punch quest, you’ll need to head through the Stables into the Training Area. There, you will find a Banner to interact with. Doing so will create a circle you must remain in to secure the point. The second Banner will be located in the Central Courtyard, if you we’re headed to the Kitchens. Capture this Banner & make your way over to the locked door in the Central Courtyard. Interacting with it will open up a new area, the Tenshu Entrance.
Once you’ve done this, locate the Shogun’s Sanctum & travel until you enter the War Room. Once there, an Oni will spawn in that you must defeat. After doing so, he’ll drop the ‘Shogun’s Hanko’. Take this item & place it into the door with the golden circle inside of the War Room. Go back into the War Room & kill specially marked zombies to power up the World Seed. After providing ample amounts of souls, the Pack-A-Punch will be available.
Step 2: Obtain the Wonder Weapon
You’ll need the Wonder Weapon to proceed in the Main Quest. First, you must craft the Maneki Neko. To do this, you need 3 main parts. These are the three parts you’ll need & where you can find them:
- Cat Doll
- Location 1 – In the Kitchen on top of a barrel.
- Location 2 – In the Gatehouse on top of a barrel.
- Karakuri
- Location 1 – In the Storage Room opposite to the MK78 Wall Buy. It will be on a counter next to a lantern.
- Location 2 – In the Workshop next to a Wicker Basket
- Bell
- Location 1 – In the Staging Area, the Bell can be found hanging off a wooden beam.
- Location 2 – The Training Area hanging off the top of the wall, to the right.
- Location 3 – On the entrance of the buried house, in the Stables
After collecting these three pieces, head to the Workshop & craft the Maneki-Neko Tactical. It can be crafted again for 500 Salvage. It can also be upgraded which will be required later on. Here’s how you can upgrade the Maneki-Neko Tactical:
- White Powder
- Head to a Crafting Bench & craft a Combat Bow. Make your way to the Central Courtyard in-front of the giant tree. There are several holes in the wall of the Castle facing the giant tree. Activate the Spectral Marksman trap & a blue target will appear on the tree.
- Shoot the target with the Combat Bow & then shoot the second target that appears. Once the trap is finished, a white powder should appear along the wall they were just firing out of.
- Matches
- Within the Kitchen, there’s a bookshelf directly across from the Double Tap Machine. You can find & collect the matches off of that shelf.
- Coal
- There is a piece of coal you can collect off the stove where you first enter the kitchen.
Once you’ve collected all of these pieces, head back over to the workbench you crafted the Maneki-Neko Tactical. You can now craft the upgraded Maneki-Neko Tactical.
Nekomancer Wonder Weapon
Cat Cage
If you head into the Tenshu Eaves, you can find a cage containing a cat trapped within. It will be higher up & to the left of the Ammo Cache within the room. Using PHD Flopper underneath it will knock it down to pick up.
You then must take this cage & toss it into a lava pool. The cat will break free & swim away through the lava.
Paw Prints
There are four potential places that this step can be started. You’ll need to have crafted the Maneki-Neko Tactical to do this step as well. These are the following locations:
- Flower Garden – Near the stairs between the Rifleman Trap statues.
- Training Area – Underneath the gate headed into the Stables area.
- Stables – Under the Yellow Lamp.
- Kitchen – Top of the stairs leading to the Kitchen.
You must kill a zombie on-top of one of these locations to trigger paw prints to spawn. Follow the direction the paw prints go & kill a zombie further along. Repeat this roughly 7 times until the paw prints form a circle.
Make sure the lava is active in that area, & throw down the Maneki-Neko Tactical. If done correctly, an Abomination will spawn in. Once you eliminate it, the cat will spawn in & run away.
Find the Cat/World Seed
There are 3 different locations of creaky floorboards within the map. Two within the kitchen, & one in the training area. The cat will be located underneath one of those. Buying Death Perception helps immensely with this step. You’ll need to listen for the cat to meow to know you’re in the right place.
You need to sneak around the creaky floorboards in order to grab the cat carefully. Once you grabbed the cat, head up to the World Seed next to Pack-A-Punch & place the cat on it. You then must kill enough zombies till the seed is pulsing, & then melee it until the cat is freed. You will then have the Nekomancer Wonder Weapon!
Lighting the Lanterns
There are 11 lantern statues in total that you need to shoot with the Nekomancer Wonder Weapon. This is a timed step, with roughly 7 or so seconds per lantern you shoot. The lanterns can be found in the following locations & can be followed in the optimal route:
- Tenshu – To the left of the Onsen Bath entrance
- Central Courtyard – Near the entrance to the Kitchen Area
- Kitchen – On the down the stairs on the right side
- Flower Garden – Near the Gobblegum Machine
- Gatehouse – Near the Speed Cola Machine
- Outer Ward – Infront of the Mystery Box Location
- Staging Area – On the hillside leading into the Central Courtyard
- Stables – Located near the Gobblegum Machine on the right side
- Training Area – Out of bounds to the far right of Melee Macchiato
- Tea Garden – Infront of the Mystery Box Location
- Central Courtyard – Located on the underside of the tree, visible from the Tea Garden entrance
Music will begin once you initiate this step. It will play a distinct tune if you fail, & another for success. Head up into the War Room where a ghost will spawn. Interact with it for some dialogue & once it’s finished, you can begin to collect evidence.
Key Items & Evidence
All of the following are key items you can grab & the evidence boxes that correspond to them. You can collect to solve the mystery within the map, as well as how to obtain them.
Fox Mask
- Use the Glider from the castle down, where you’ll need to veer right & grab the Fox Mask off the edge of a building. It will be on the side of the giant tree.
- You’ll want to take this fox mask & head into the Storage Rooms & locate a wall of masks. Placing it on the wall will begin a game of Simon Says. Different masks will light up in an order, in which you’ll need to kill zombies wearing those masks in the corresponding order. This will repeat for 3 rounds.
Evidence Box
- Once you’ve completed this, interact with the mask & it will move into three different places. You’ll need to shoot it for it to drop another evidence piece. These are the 3 locations, & the evidence they drop once you shoot the mask.
- #1 Workshop – Mask will spawn on a shelf under the stairs & drop a Pipe.
- #2 Collapsed Study – Mask will spawn on above a beam to the left of the Gobblegum Machine if you’re facing away from it. It will drop Takeo’s Case.
- #3 Onsen Baths – Mask will spawn outside of a barrier directly to the left of Elemental Pop. It will drop a Comb.
- Remember to place this evidence into the Meditation/Evidence Room to reveal the first portrait.
Coin Purse
- To collect the Coin Purse, you need to locate a Mystery Box location that contains a coin on the top of the box to the left. This can be any box location.
- Craft the Maneki-Neko Tactical & throw it directly at the Coin on the box. You’ll then want to spin the box. The Coin Purse will be within the box. Grab it & head to spawn.
- Once in spawn, head over to the Rampage Inducer. The Coin Purse will begin floating next to it, all you need to do is interact with it to trigger an evidence cutscene.
Evidence Box
Shears
- For the next evidence pieces, you’ll need to water plants within the Gardens. To do this, you’ll need a bucket. They can be found in the following locations:
- In the Tea Gardens on a shelf, surrounded by vases & ornaments.
- On the right of the MPC wall-buy in the Stables.
- The top floor of the Onsen Baths, near a pair of sandals.
- Fill these buckets at any water location you can find. These buckets contain three pours of water when filled. Taking damage, jumping or sprinting will cause the water to spill. You need to take this water to the Gardens & water 3 plants:
- Directly infront of the Rifleman Trap, on the left corner of the destroyed bridge.
- To the left of a weapon wall-buy on the Rifleman Trap side of the Gardens.
- On the path between Wisp Tea & the Crafting Table.
- Water will splash & you need to interact after it happens to water the plant. After all three are watered, 2 Golden Flowers will spawn, alongside a Gardener Zombie. This Gardener Zombie is invincible until you disable the Golden Flowers with the Nekomancer Wonder Weapon.
- Once you eliminate the Gardner, he will drop the Shears evidence piece. He will also drop a note to pick up.
Mercantile’s Abacus
- Head into the Kitchen & locate a small crate atop a shelf. Melee it to knock down a tomato onto the ground. A zombie will pick it up to eat it, & will begin to follow you around. You need to lead this zombies to the Staging Area.
- There’s a specific window in the Staging area, on the left of the hillside leading into the Central Courtyard, & to the left of the lantern stature you have to light. Kill the tomato zombie infront of this window to spawn a Merchant Zombie.
- This zombie will proceed to eat fruits off the ground to regain health as you damage it. After you eliminate him, he’ll drop a note, & the Mercantile’s Abacus evidence piece.
Noble’s Hat
- Purchase Decoys from a crafting bench, & head over to the Training Area. Look above the blown out wall & throw a decoy into each of the windows. After doing so, a Noble Zombie will open the window up & begin to throw grenades.
- You need to throw these grenades back into the windows to kill the Noble Zombie. Once he’s eliminated, he’ll drop a note & the Noble’s Hat evidence piece.
- Remember to place this evidence into the Meditation/Evidence Room to reveal the 2nd portrait.
Poison Evidence Box & Key Item
Note
- When you’re in the War Room, there will be a note to the left of the stairs leading upstairs. This will detail the different poison items you will be collecting.
Monkshood Flower
- If you head into the Flower Gardens, there will be a specific plant you need to pick up. This can be located to the left of the Crafting Bench, on top of a rock, right before the lava river.
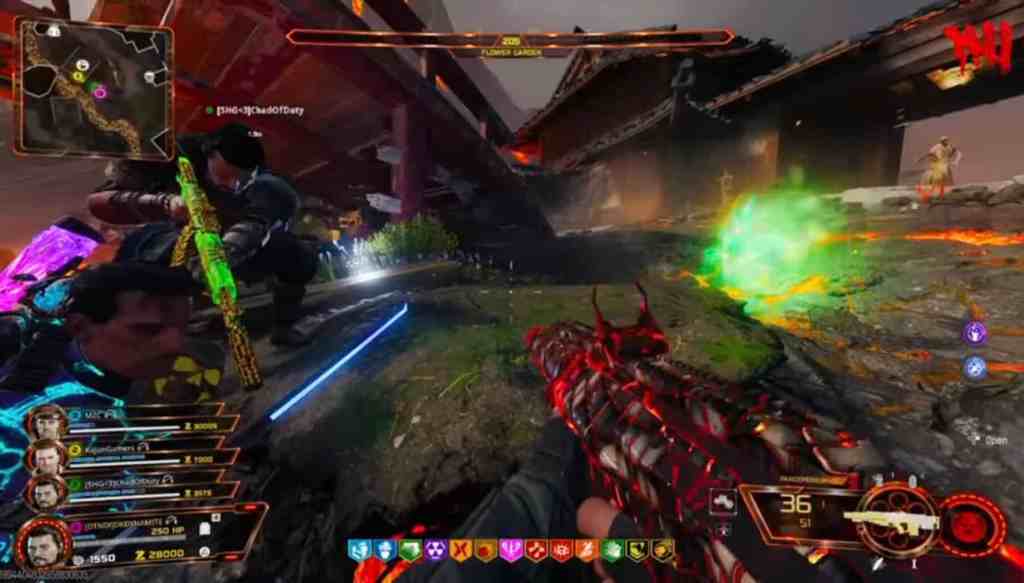
- Once you’ve grabbed this plant, make your way into the Training Area & use a charged shot from the Nekomancer Wonder Weapon to shoot down a Pouch (Key Item). This pouch is located on a broken beam in front of the ammo cache (if facing the ammo cache). Pick it up after knocking it down.

- You’ll then want to take the plant you picked up to a pot in the Tenshu Entrance. This pot is located through the gates, past the trap, & to the left of the Exfil Phone Booth. Place the plant inside.
- Wait for a fissure to strike on the map & head into it. You need to stand inside the enveloped area till you lose around 100-150 health. You’ll then get a notification that the Pouch has been filled with Volcanic Ash.
- Take this ash back to the potted plant & interact to drop the ash in there. Once this is done, head to the Cherry Blossom tree within the castle grounds. Melee it three times to activate a Euphoric type blessing onto yourself.
- Head back over to the plant & run in a small circle till you create a small tornado within the pot. Once the pot settles, you’ll be able to claim the Monkshood Flower.
Plum Pit
- Within the Kitchen, there are 3 baskets all containing different fruits & vegetables. The basket to the left of a yellow lantern will contain plums. Melee the basket to knock a plum onto the floor. Jump onto the plum 3x to get the Plum Pit evidence.
Pufferfish
- Once you make your way into the Storage Rooms, look for a 3×3 grid shelf. All these shelves should have little scrolls within them. Interacting with this will start a game of whack-a-mole of sorts.
- A cat toy will spawn on the side of the grid as a timer. You need to shoot the scrolls back into their slots. When you shoot one scroll, another or multiple will pop back out. Try to focus on the corner scrolls first. After they’re all back inside the grid, one will pop out the middle into the floor. Pick it up to reveal the Court Doctors Note & the Pestle.
- Once you’ve collected these, head to the Kitchen & interact with a bowl located on a stone slab. This bowl functions as a soul box. Using the Nekomancer WW charged shot, or a weapon with Brain Rot, kill zombies around the bowl to fill the bowl. After doing this, a cutscene with spirits will play, & the Pufferfish will spawn on a shelf near the fire pit in the floor.
- Remember to place this evidence into the Meditation/Evidence Room to reveal the 3rd portrait.
Sake Cup
- After placing all of the Toxin evidence pieces & the third portrait is revealed, you can grab a ceramic shard off of the portrait itself. The next ceramic shard you can grab is located in the War Room. There will be a small pool of blood on the ground to the left of that stairs. Interact with it to reveal the 2nd ceramic shard.
- Take both of these ceramic shards to the Tea Garden. You’ll then want to place them on the Kintsugi Station. From there, you can repair the Sake Cup Key Item. Once you end the round, the Sake Cup, will begin to glow blue. Grab it & wait for the next spirit cutscene to finish.
Evidence Box
Horse Statue
- After grabbing the Sake Cup, make your way into the War Room & place the cup on a small mat to the left of the table in the room’s center. This will trigger the cup to float & begin sending out a pulse. You must defend the cup from the incoming undead, otherwise it’ll break & you’ll have to start over. Once this defense is complete, the Horse Statue Evidence Piece will spawn to collect.
Painter’s Brush
- Your next defense will be located in the Collapsed Study. If you’re entering the room from the rooftops, you’ll want to place the Sake Cup in the far left corner of the room. Defend it again, & the Painter’s Brush Evidence Piece will spawn for collection.
Tea Whisk
- The final defense will be held in the Tea Garden. Take the cup to a spot right infront of a small Sword Display. Defend the cup one final time. This time will differ though however, as a Hell Hound will spawn in & take the cup. You need to chase him down (he’s faster & stronger than an average Hell Hound) to reclaim the cup. Once you’ve done so, the Tea Whisk Evidence Piece will drop.
- Remember to place this evidence into the Meditation/Evidence Room to reveal the 4th portrait.
Evidence Box #5
Shogun’s Hanko
- The Shogun’s Hanko is the first item collected for this evidence box. You collect this piece during the PAP Quest after killing the first Oni.
Netsuke of Brothers Statue
- To claim the Netsuke of Brother’s Statue, you’ll need to head over to the Stables & wait for the lava to cool over & harden. You’ll then want to use an explosive (such as a Semtex) on the hardened lava.
- When you do this, the lava will bubble for a minute, but the statue will have popped out, ready to be claimed. If it doesn’t initially let you claim it, try to work the statue over to a solid piece of ground (not areas usually submerged in lava).
- This statue is also VERY small. So keep your eyes peeled & a sharp lookout for the pickup prompt where you throw the explosive.
Crest Medallion
- This requires you to have revealed the 4th portrait on the wall. After you’ve revealed it, a clock will be uncovered down in the Storage Room. It will show off 4 different times/numbers that you need to keep track of in the exact order.
- After interacting with this, glowing blue numbers will spawn in the following locations:
- Central Courtyard – To the left of the Tea Garden Entrance
- Flower Garden – Next to Wisp Tea
- Outer Ward – Right behind where you spawn into the map
- Stables – On the back of the submerged building
- One thing to note is that after you end the round once activating the clock, a defense round will begin. There will be special zombies you need to eliminate with priority. They will be glowing & carrying flags.
- The flags will be placed into the Staging Area after the round ends. You’ll then need to in look in the 4 locations listed above for symbols. These symbols are 1 – 4. Your objective is to place up to 2 flags that add up to the times/numbers the clock showed you earlier.
- For example, if the clock showed you 5, 7, 4, 6 – you’d place up to 2 flags below the glowing symbol to equate to 5 in the Flower Garden, if the glowing blue symbol indicates its first in the placement sequence.
- Once you’ve completed this, head back to the clock. You can then open it up & claim the Crest Medallion evidence piece. Placing this last set of evidence will reveal the final portrait.
Solving the Murder Mystery
Now it’s time to solve the murder mystery you’ve been gathering evidence for this whole time. This is where the notes will come in handy, as well as the traps. You’ll need to place different items under each portrait to solve the mystery.
Portraits
First Portrait
- You must place different items underneath the portraits to solve this. The first item will always be the Comb under the first portrait.
Second Portrait
- The second portrait can be solved by using the traps around the map. The ghost rifleman will give hints as to who they saw the night of the Shogun’s murder.
- Each accomplice is connected to a specific item you’ve picked up.
- Noble – Noble Hat
- Gardener – Shears
- Merchant – Abacus
Third Portrait
- The third portrait can be solved using the accomplice & the symptoms stated in the Doctor’s Note.
- Take a look at the Court Doctor’s Note to establish the time of death, & the cause of death. Once you’ve looked at these, you can then look at the Toxin note to correlate the symptom with the item used.
- For example, both the pufferfish & plum can cause Emesis. So you could narrow it down to them, then use another note that stated the victim was allergic to plums. That would secure your item used to poison the Shogun, & the one you’d need to place under the 3rd portrait. These are the symptoms for each item:
- Pufferfish – Emesis & Paralysis
- Plum Pit – Emesis & Cardiac Failure
- Monkshood Flower – Paralysis
- These are the known combinations to solve the third portraits item:
- Gardener + Emesis = Plum Pit
- Gardener + Paralysis = Monkshood
- Nobleman + Noxious Plant = Monkshood
- Nobleman + Emesis = Pufferfish
- Merchant + Noxious Plant = Plum Pit
- Merchant + Emesis/Paralysis = Pufferfish
Fourth Portrait
- To solve the fourth portraits item, you’ll need to take note of the painting in the back of the portrait. This painting will determine what item you’ll have to place under the fourth portrait. These are the paintings & their corresponding items:
- Mountains in background = Horse Statue item
- Bird in background = Paint Brush item
- Fish in background = Tea Whisk item
Fifth Portrait
- The last item to place under the final portrait will always be the Crest Medallion.
Zodiac Dial
If you read the Doctor’s Record Note, you’ll see the time of death is connected to an animal (rat, dragon, snake, etc). The dial operates like a 12 hour wall clock. Each animal on the dial represents an hour. The Record Note will tell you which animal to set the dial to.
The Toxin Note will tell you the amount of time it takes for the Toxic item symptoms yo take hold. The time you need ti keep note of is for the item you placed under portrait three. Whether it be 2 or 3 hours, you’ll subtract that from the time the dial is set to.
For example, if the Dial is set to 9, & the amount of time your toxic item takes is 3 hours, you’d subtract 3 hours from the dial & set it to 6 instead of 9.
Once you’ve done this, interact with the incense on the sides of the room. If done incorrectly, it will spawn enemies & you’ll need to flip the round to try again. If successful, a bright orange orb will spawn & travel up to the World Seed Room.
Interacting with the World Seed will begin the final encounter. You’ll be put against a mini-boss, which essentially is a buffed Oni. After defeating it, you’ll be transported to the actual final boss.
Boss Fight
Once you’ve entered the Boss Fight arena, capturing the flag is the first step to trigger the dragon to begin the assault. Once you’ve captured the flag, a force field will form to protect you while you deal damage to the dragon. As the fight goes on, zombies will spawn carrying flags that you’ll need to eliminate, grab the flags, & place into certain spots.
Simply repeat placing the flags to create the force field & damage the dragon. Focus on the eyes at first to reveal more weak spots across the dragon. Speaking of which, the dragon has no shortage of attacks to unleash.
Dragon fire will at times cover nearly the entire playing field. Hiding next to rocks can provide a bit of respite. The dragon also will throw fire tornado whirlwinds or slamming into the ground & launching you into the air. All of this while you have to fend off the undead, as well as Onis.
If you’ve completed the Totenreich boss fight, you’ll also receive Dravakar’s blessing during the boss fight.
Completion Rewards
Completing the Kowakujo Easter Egg will net you the ‘Purified’ Takeo Operator Skin, as well as the Main Quest Completion Calling Card. If you manage to finish the Main Quest before Directed Mode support is added, you’ll earn the special Early Completion Calling Card!
THE END
That’s all we’ve got on the Kowakujo Main Quest! For a video covering the new Main Quest, check it out below:

Stay connected with any new updates on Black Ops 7 Zombies as they release on our Twitter, Facebook, and our YouTube Channel!